Acrylic is one of the most versatile materials for laser cutting, offering unparalleled precision, smooth edges, and a striking visual appeal. Whether used for intricate jewelry, signage, or industrial applications, its adaptability makes it a go-to choice for laser enthusiasts. Understanding the acrylic laser cutting and engraving ensures professional-grade results while minimizing common issues like charring and melting.

1. Why Acrylic is a Preferred Material for Precision Cutting
Acrylic laser cutting is popular for its durability, clarity, and clean finish. It enables precise, intricate designs with crisp edges—ideal for signage, jewelry, art, and architectural models. Unlike other plastics, acrylic cuts smoothly without fraying, offering a polished look straight from the laser.
Its consistent composition ensures high-precision cuts without warping, even under heat. Acrylic also transmits light well, making it perfect for LED edge-lit signs and illuminated displays.
Key Advantages of Using a Laser Cutter for Acrylic
Laser cutters offer an unmatched level of detail and efficiency when working with acrylic. Unlike traditional cutting methods that can leave rough or uneven edges, laser cutting produces smooth, flame-polished finishes with minimal post-processing.
Additionally, laser technology allows for intricate cuts and engravings, making it the ideal choice for complex, high-precision projects.

2. Types of Acrylic for Laser Cutting
2.1 Cast Acrylic vs. Extruded Acrylic: Key Differences and Performance
Cast acrylic and extruded acrylic differ in manufacturing processes, affecting their engraving and cutting properties.
Cast acrylic engraves with a frosted finish, making it ideal for decorative pieces, whereas extruded acrylic engraves more transparently.
In cutting applications, cast acrylic produces sharper edges, while extruded acrylic offers a smoother cut but is prone to melting due to its lower melting point.
|
Parameter |
Cast Acrylic |
Extruded Acrylic |
|
Manufacturing Process |
Polymerization in molds yields a uniform molecular structure with controlled optical and physical properties. |
Continuous extrusion creates sheets with less control over molecular orientation, leading to slight variances. |
|
Thickness Uniformity |
Exhibits uniformity with low deviation, essential for precise laser focusing and consistent engraving. |
Performs better uniformity than cast acrylic, which means it can be excellently laser engraved on the surface. |
|
Optical Clarity |
Offers superior clarity with low haze levels (<1%), ideal for applications requiring pristine transparency. |
Higher haze levels (1-2%) and minor color variations, which may impact visual quality in high-end projects. |
|
Thermal Properties |
Demonstrates higher heat resistance and stable thermal expansion, reducing the risk of deformation during engraving. |
Lower heat resistance, prone to melting and edge charring when exposed to sustained laser energy. |
|
Engraving Quality |
Delivers crisp, well-defined frosted engravings with precise detail due to its consistent composition and low thermal distortion. |
Tends to produce a softer, less distinct engraving effect with potential for uneven detail owing to thickness variability. |
|
Cutting Edge Quality |
Produces smooth, polished edges with minimal burrs, ensuring high-quality finishes after laser cutting. |
May result in rougher, melted edges that require additional post-processing for a clean, refined finish. |
|
Cost Efficiency |
Generally commands a higher price reflecting advanced manufacturing processes and superior performance consistency. |
More cost-effective, though with trade-offs in uniformity and precision compared to cast acrylic. |
2.2 Choosing the Right Acrylic Type for Your Project
Selecting between cast and extruded acrylic depends on the project's requirements.
If engraving depth and contrast are essential, cast acrylic is the preferred choice.
If a cost-effective solution is needed for large-scale production, extruded acrylic provides efficiency with smoother cuts.
Understanding these differences ensures optimal material performance and aesthetic appeal.

3. Optimizing Laser Settings for Acrylic Cutting
3.1 Recommended Laser Settings for Smooth Cuts
Achieving clean acrylic cuts requires precise power and speed settings. Too much power can cause excessive melting, while insufficient power may result in incomplete cuts.
For 3mm acrylic, an 80% power setting with an 8mm/s speed ensures smooth, flame-polished edges. Adjustments may be necessary depending on acrylic thickness and laser wattage.
Learn more: Laser Settings for Different Materials
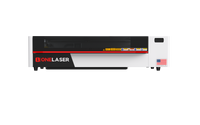
Watch the XRF in action as it cuts through 1/2" and 1/4" acrylic with ease.
3.2 Air Assist
Air Assist plays a crucial role in acrylic laser cutting by directing a steady stream of air onto the cutting path. This prevents flame flare-ups, reduces soot buildup, and enhances edge clarity.
By keeping the laser beam path clear, Air Assist ensures consistently smooth cuts while reducing the risk of overheating or material distortion.
3.3 How to Avoid Overburning?
To prevent overburning, optimize the laser's speed-to-power ratio. Slower speeds with high power generate excess heat, causing melted edges. Increasing cutting speed while maintaining adequate power reduces material distortion.
Additionally, using protective masking tape on acrylic sheets minimizes surface blemishes and helps achieve a crisp, clean finish.
3.4 Choosing the Right Laser Cutter
Selecting an appropriate laser cutter is essential for professional acrylic cutting.
The OneLaser X Series provides superior precision with its high-powered CO2 laser, making it ideal for intricate designs and thick acrylic sheets.

The OneLaser Hydra series offers robust performance with an extended work area, perfect for large-scale acrylic projects requiring uniform accuracy.

4. Designing for Laser-Cut Acrylic Projects
4.1 Preparing Vector Files for Precision Cutting
When cutting materials, vector design would be more recommended instead of raster design. Vector-based designs ensure accuracy and scalability in acrylic cutting. Files should be created in formats such as SVG, AI, or DXF to maintain sharp line quality.
Using precise stroke weights and closed paths prevents errors during cutting, ensuring every detail of the design is faithfully executed by the laser.
Learn more: Raster Engraving vs. Vector Engraving - What Are the Differences?
4.2 Best Design Software for Laser Cutting Acrylic
Industry-standard software like LightBurn allows for advanced vector design capabilities. These programs offer features such as node editing, path optimization, and layering, ensuring seamless integration with laser cutting workflows.
Compatibility with laser cutter controllers ensures smooth translation of digital designs to physical acrylic pieces.
Learn more: Best Laser Engraving Software
4.3 Avoiding Common Design Mistakes for Clean, Accurate Cuts
Designing for acrylic cutting requires attention to fine details. Avoid using overly intricate patterns with tight spacing, as excessive heat buildup may cause melting. Ensure stroke lines are properly set to hairline thickness to prevent engraving errors.
Additionally, accounting for kerf width ensures precise fitting in multi-piece assemblies.
5. Step-by-Step Guide to Create an Acrylic earrings with Laser Cutter
5.1 What You'll Need
- Acrylic sheets (Red, White, and Blue)
- Basswood sheet
- OneLaser XRF CO2 laser cutter
- Laser-compatible adhesive
- Fine-grit sandpaper
- Silver ring base (adjustable size)
- Jewelry glue or epoxy resin
- Engraving software (e.g., LightBurn)
5.2 An Ultimate Guide to Cut Acrylic Earrings
Step 1: Preparing the Acrylic Sheets
Before starting, clean the acrylic sheets with a microfiber cloth to remove any dust or fingerprints. Secure the sheets on the laser cutter bed, ensuring they lay flat to prevent uneven cuts.

Step 2: Designing the Shield Components
Using vector design software, create the Captain America shield design in layers:
- Basswood bottom
- Red outer center
- White inner ring
- Blue circle center
- Inner white star
Make sure each layer is precisely aligned to stack neatly once assembled.
Step 3: Setting Up the Laser Cutter
Load your design into the laser software and adjust settings for cutting and engraving acrylic. Recommended parameters:
- Cutting (3mm acrylic): 80% power, 8mm/s speed
- Using Air Assist: ON (to prevent burn marks and improve edge clarity)
Run a test cut on a scrap piece of acrylic to verify the settings before starting the final cut.


Step 4: Cutting and Engraving the Acrylic Shield
Place each colored acrylic sheet into the laser cutter and cut out the corresponding layers.
- Use blue acrylic for the central circle.
- Use white acrylic for the engraved star.
- Cut rings from red and white acrylic to form the shield's layers.
After cutting, inspect the edges for smoothness. If needed, lightly sand with fine-grit sandpaper.

Step 5: Assembling the Shield
Stack the layers in order, applying laser-compatible adhesive between them. Press firmly and let them dry for at least 30 minutes.
Once assembled, apply a thin layer of clear epoxy resin to enhance shine and durability.

Step 6: Attaching the Shield to the Ring Base
Once the epoxy has fully cured, attach the miniature shield to a silver ring base using strong jewelry glue or resin. Let it set completely before handling.
Step 7: Finishing Touches
For extra refinement:
- Buff the edges with a polishing compound for a professional finish.
- Add a clear acrylic topcoat to protect the design from scratches.
With precise laser cutting and careful layering, your miniature Captain America shield ring is complete! This unique acrylic piece makes a perfect gift, cosplay accessory, or collector's item.

Try experimenting with different acrylic colors, ring bases, and engraving depths to customize the design even further!
Watch the tutorial to make these epic Captain America Shield Earrings:
6. FAQs
Q: How can I prevent burn marks during acrylic laser cutting?
A: Use protective masking tape and optimize your laser speed settings to reduce surface burns.
Q: Why are the edges of my acrylic rough after laser cutting?
A: Turn on Air Assist and adjust the cutting power for cleaner, smoother edges.
Q: What causes inconsistent cuts in acrylic laser cutting?
A: Dirty laser lenses and poor calibration. Regular cleaning and maintenance help fix this.
Q: What are some creative uses for acrylic laser cutting?
A: You can make custom signage, home décor, jewelry, accessories, and precision prototypes.
Q: Is it safe to laser cut acrylic at home or in a workshop?
A: Yes, with proper ventilation, fire safety precautions, and careful material storage.
Q: Why is ventilation important in acrylic laser cutting?
A: Acrylic emits fumes when cut. Good airflow prevents toxic buildup and keeps your workspace safe.
Q: Can acrylic catch fire during laser cutting?
A: Yes, always monitor the laser while it’s running and never leave it unattended.
Q: How should I store acrylic sheets for laser cutting?
A: Keep them flat in a cool, dry place to prevent warping or cracking.
Conclusion
Mastering acrylic laser cutting requires precision, the right machine, and optimal settings. Experimenting with design techniques and staying informed about industry advancements unlocks new creative possibilities. With innovation driving future trends, acrylic laser cutting continues to shape industries from personalized art to high-tech engineering.