Brandt, the hands-on creator behind Bearded Builds CO, is no stranger to laser engraving community. His channel is packed with practical guides, build projects, and real-world laser advice. In one of his standout videos, he dives deep into laser beam alignment, specifically for the OneLaser XRF, part of the X Series lineup.
If you’ve ever wondered why your cuts aren’t clean or why your engraving seems off, this guide, based on Brandt’s walk-through, is your new best friend. Whether you're a beginner or a seasoned maker, laser alignment is a must-know skill for maximizing power, precision, and safety.

1. Why Laser Beam Alignment Matters
Before diving into the steps, let’s get clear on why beam alignment is crucial:
- Consistent cuts and engravings
- Maximum laser power hitting the right spot
- Reduced wear on your optics (mirrors and lens)
- Better precision across your work area
Even a small misalignment can cause weak burns, crooked paths, or missed spots - so taking the time to tune your beam pays off big.
2. Tools You’ll Need
- Masking tape or thermal paper
- Sharpie or marker for marking pulses
- Allen wrench for adjustment screws
- Safety glasses
- Clean mirrors and lens
Note: Always follow safety protocols when pulsing your laser.
3. Step-by-Step Laser Beam Alignment Guide
Step 1: Visually Inspect the CO₂ Laser Tube and Mirrors
Start with a basic check:
- Is the laser tube seated correctly?
- Are the mirrors securely in place, not wiggling or loose?
- Use the OneLaser X Series quick-release thumb screws to remove and inspect mirrors—no special tools required!
Step 2: Understand the Mirror Path
Most gantry-style CO₂ lasers have three mirrors:
- Mirror 1 – receives the beam directly from the laser tube
- Mirror 2 – usually sits mid-gantry and redirects to the laser head
- Mirror 3 – located just before the lens on the laser head
Step 3: Test the Most Radical Points
This is where you begin beam testing. According to Brandt:
- Start with the most extreme positions: Back-left (laser origin) → Front-right (farthest point)
- Ignore the red dot — it’s not your laser beam!
- Tape over each mirror’s test area and pulse the beam
- Mark the dot with a Sharpie
- Compare pulse positions from both ends
If the dots overlap: great! If not, it’s time to adjust.
Step 4: Adjusting the Mirrors (One by One)
Here’s how to align mirror by mirror.
Mirror 1 to Mirror 2
- Move the laser head forward and back
- Compare dot positions on the tape
- Make all adjustments using Mirror 1’s thumb screws
- Aim for the dots to land on top of each other
Mirror 2 to Mirror 3
- This is the most sensitive area—alignment here affects your laser head
- Use Mirror 2’s screws for fine-tuning
- Top screw = Up/Down adjustment
- Side screw = Left/Right adjustment
- Remember: clockwise pushes the beam; counter-clockwise pulls it
⚠️ Pro Tip: Make micro-adjustments. Less is more when tweaking alignment.
Step 5: Confirm Final Alignment at the Laser Head
After mirror-to-mirror tuning, you’ll pulse directly at the head:
- Place tape where the beam enters the lens housing
- Pulse from different points (close vs. far) and check for overlap
- You want consistent, centered hits every time
If you’re still off: go back and recheck Mirrors 1 and 2. A small mistake early on can ripple forward.
Step 6: Check Vertical Alignment (Optional, But Useful)
Brandt also covers vertical alignment:
- Remove the lens and nozzle
- Pulse the beam straight to the laser bed
- Use tape to ensure the beam hits center in the nozzle path
Do this at multiple Z-heights to check vertical consistency.
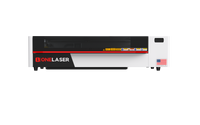
4. A Look at the OneLaser X Series
The OneLaser X Series is designed with alignment in mind — built for compact, high-precision engraving, it’s a top choice for creators who value reliability and ease of use.
- XRF Model: Features a 38W RF metal tube laser that delivers crisp, detailed engraving on a wide variety of materials. It offers instant beam startup, a longer tube lifespan, and finer engraving precision, making it a go-to for customization professionals.
- XT Model: Powered by a 55W CO₂ glass tube laser for more powerful cutting — ideal for thicker materials. It's a more affordable option for small shops or hobbyists who want high-performance results.
Whether you’re dialing in alignment or engraving tumblers, both models offer excellent access to mirrors, intuitive design, and solid construction — which makes beam alignment quicker and easier.

5. Troubleshooting Common Beam Alignment Issues
|
Symptom |
Possible Cause |
Solution |
|
Cuts are weak on one side of the bed |
Beam not centered or losing power over distance |
Realign from mirror 1 to mirror 3 |
|
Beam doesn’t show up on tape |
Lid sensors active, or power too low |
Use proper settings or disable sensor momentarily (safely) |
|
Red dot is off-center |
Irrelevant for beam, but can be realigned separately |
Adjust red dot screws |
|
Cuts are angled |
Vertical alignment is off |
Check tube height and beam center into lens |
6. Bonus Tips
- Mark with crosshairs on each tape pulse to compare position
- Use fresh tape after every adjustment for clarity
- Pulse multiple times if your laser is low-power for better visibility
- Adjust one axis at a time—never both together
- Test again after each fix—verify before moving on
7. How to Align a CO2 Laser Beam — Simplified Checklist
- Inspect the tube and mirror mounts
- Fire test pulses at extreme corners
- Check if the beam hits the same spot at near and far positions
- Adjust mirror screws gradually:
- Mirror 1 for Mirror 1–2 path
- Mirror 2 for Mirror 2–3 path
- Pulse at laser head entrance
- Remove the lens to confirm vertical alignment
- Clean mirrors, lens, and you’re done!
Final Thoughts: Get Precision, Get OneLaser
The OneLaser X Series makes alignment easier than most thanks to user-friendly hardware like quick-release mirrors and precise adjustment knobs. Following this alignment process, as shown by Brandt, ensures your machine performs at its full potential.
If your cuts are weak or inconsistent, laser beam alignment should be your first step—not the last resort.
For more expert tips, tutorials, and in-depth guidance, check out:
OneLaser Advantage:
- U.S. R&D Support
- 3-Year Limited Warranty
- Live Chat with Experts
- Join the OneLaser Community
- Flexible Payment Options & Financing Available